This video walks you through the key points — it’s the best way to understand everything in just a couple of minutes. Note the Reports tab location has changed (read below).
Further Reading
Generating and Sending Parent Payment Reports
While parents can download and print invoices directly from their TUIO account, they may occasionally need a comprehensive summary of payments made within a specific date range—for example, for tax purposes. As an administrator, you can generate a detailed payment report and send it to parents by email. The report will also be available in the parent portal, where parents can download it themselves.
How to Create a Parent Payment Report
-
Go to the Reports Tab
Click Reports, then select Receipts. After click Tax receipting and Create batch to create a new one.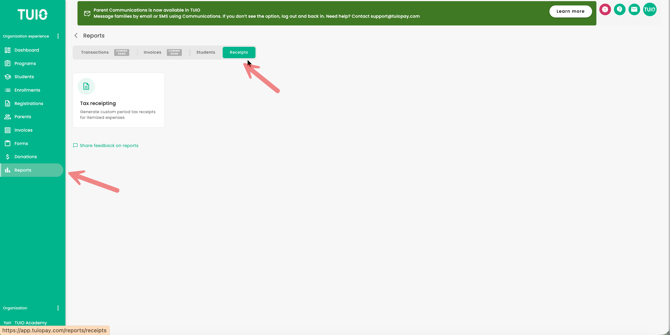
-
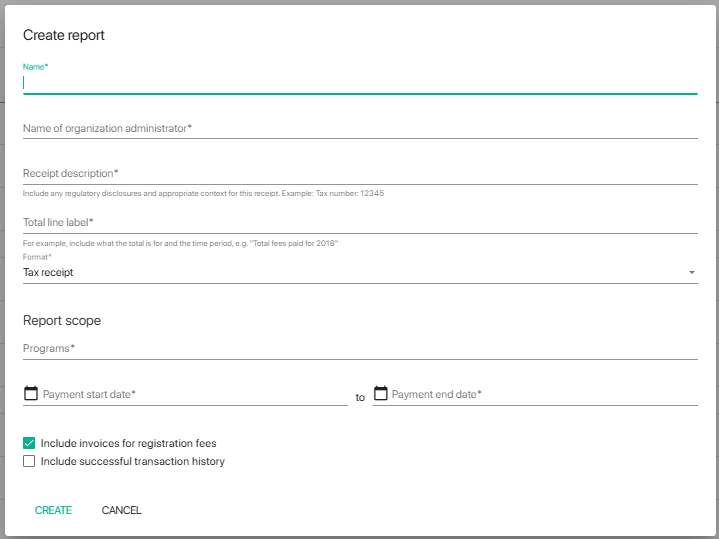
Fill in Report Details
On the report Details page, complete the following fields:-
Batch Name: Give your report a clear title, such as "Tax Receipt - 2024."
-
Receipt Description: Add optional details like your school ID number, tax number, or nonprofit registration.
-
Total Line Label: Customize the label that appears above the total, e.g., "Total tuition fees" or "Total childcare payments."
-
Format: Choose the type of PDF to generate—Tax Receipt or Donation Receipt.
-
-
Define Report Scope
Select the program(s) and payment date range to include in the report. TUIO will total each student’s payments made during that period.Optional settings:
-
Include registration fee invoices: Adds paid registration fees to the report.
-
Show transaction history: Includes invoice-level payment breakdowns.
-
-
Add Administrator Name & Signature
Enter the name of the administrator to be displayed on the report.
Upload a signature image (a photo of a handwritten signature will work fine).
Reviewing and Sending Receipts
After saving the report, continue with the following steps:
-
Preview the Report
Click Download Preview Receipt to check how it will appear to parents. -
Go to the Receipts Tab
This section shows all families included based on your report criteria.-
Activate a receipt: Check the box in the Receipt column to enable a receipt for a student.
-
Edit receipt amount (if needed): Once enabled, you can manually adjust the amount in the Receipt Amount field.
-
Send the report: Click Send to email the receipt to the parent. The Receipt Status will update to Sent.
-
Download options:
-
Use the three-dot menu to download individual receipts.
-
Click Download All to download receipts for all families at once.
-
-
-
Make Edits or Resend
If changes are needed after sending, edit the Receipt Amount and click Send again to resend the updated report.
Bulk Actions for Efficiency
You can select multiple families to perform the following actions in bulk:
-
Create Receipts
-
Edit Receipt Amounts
-
Send to Parents
-
Download Receipts
-
Delete Receipts
This makes preparing and distributing payment reports quick and easy.