a. How to Create a Donation Fund and Receive Donations
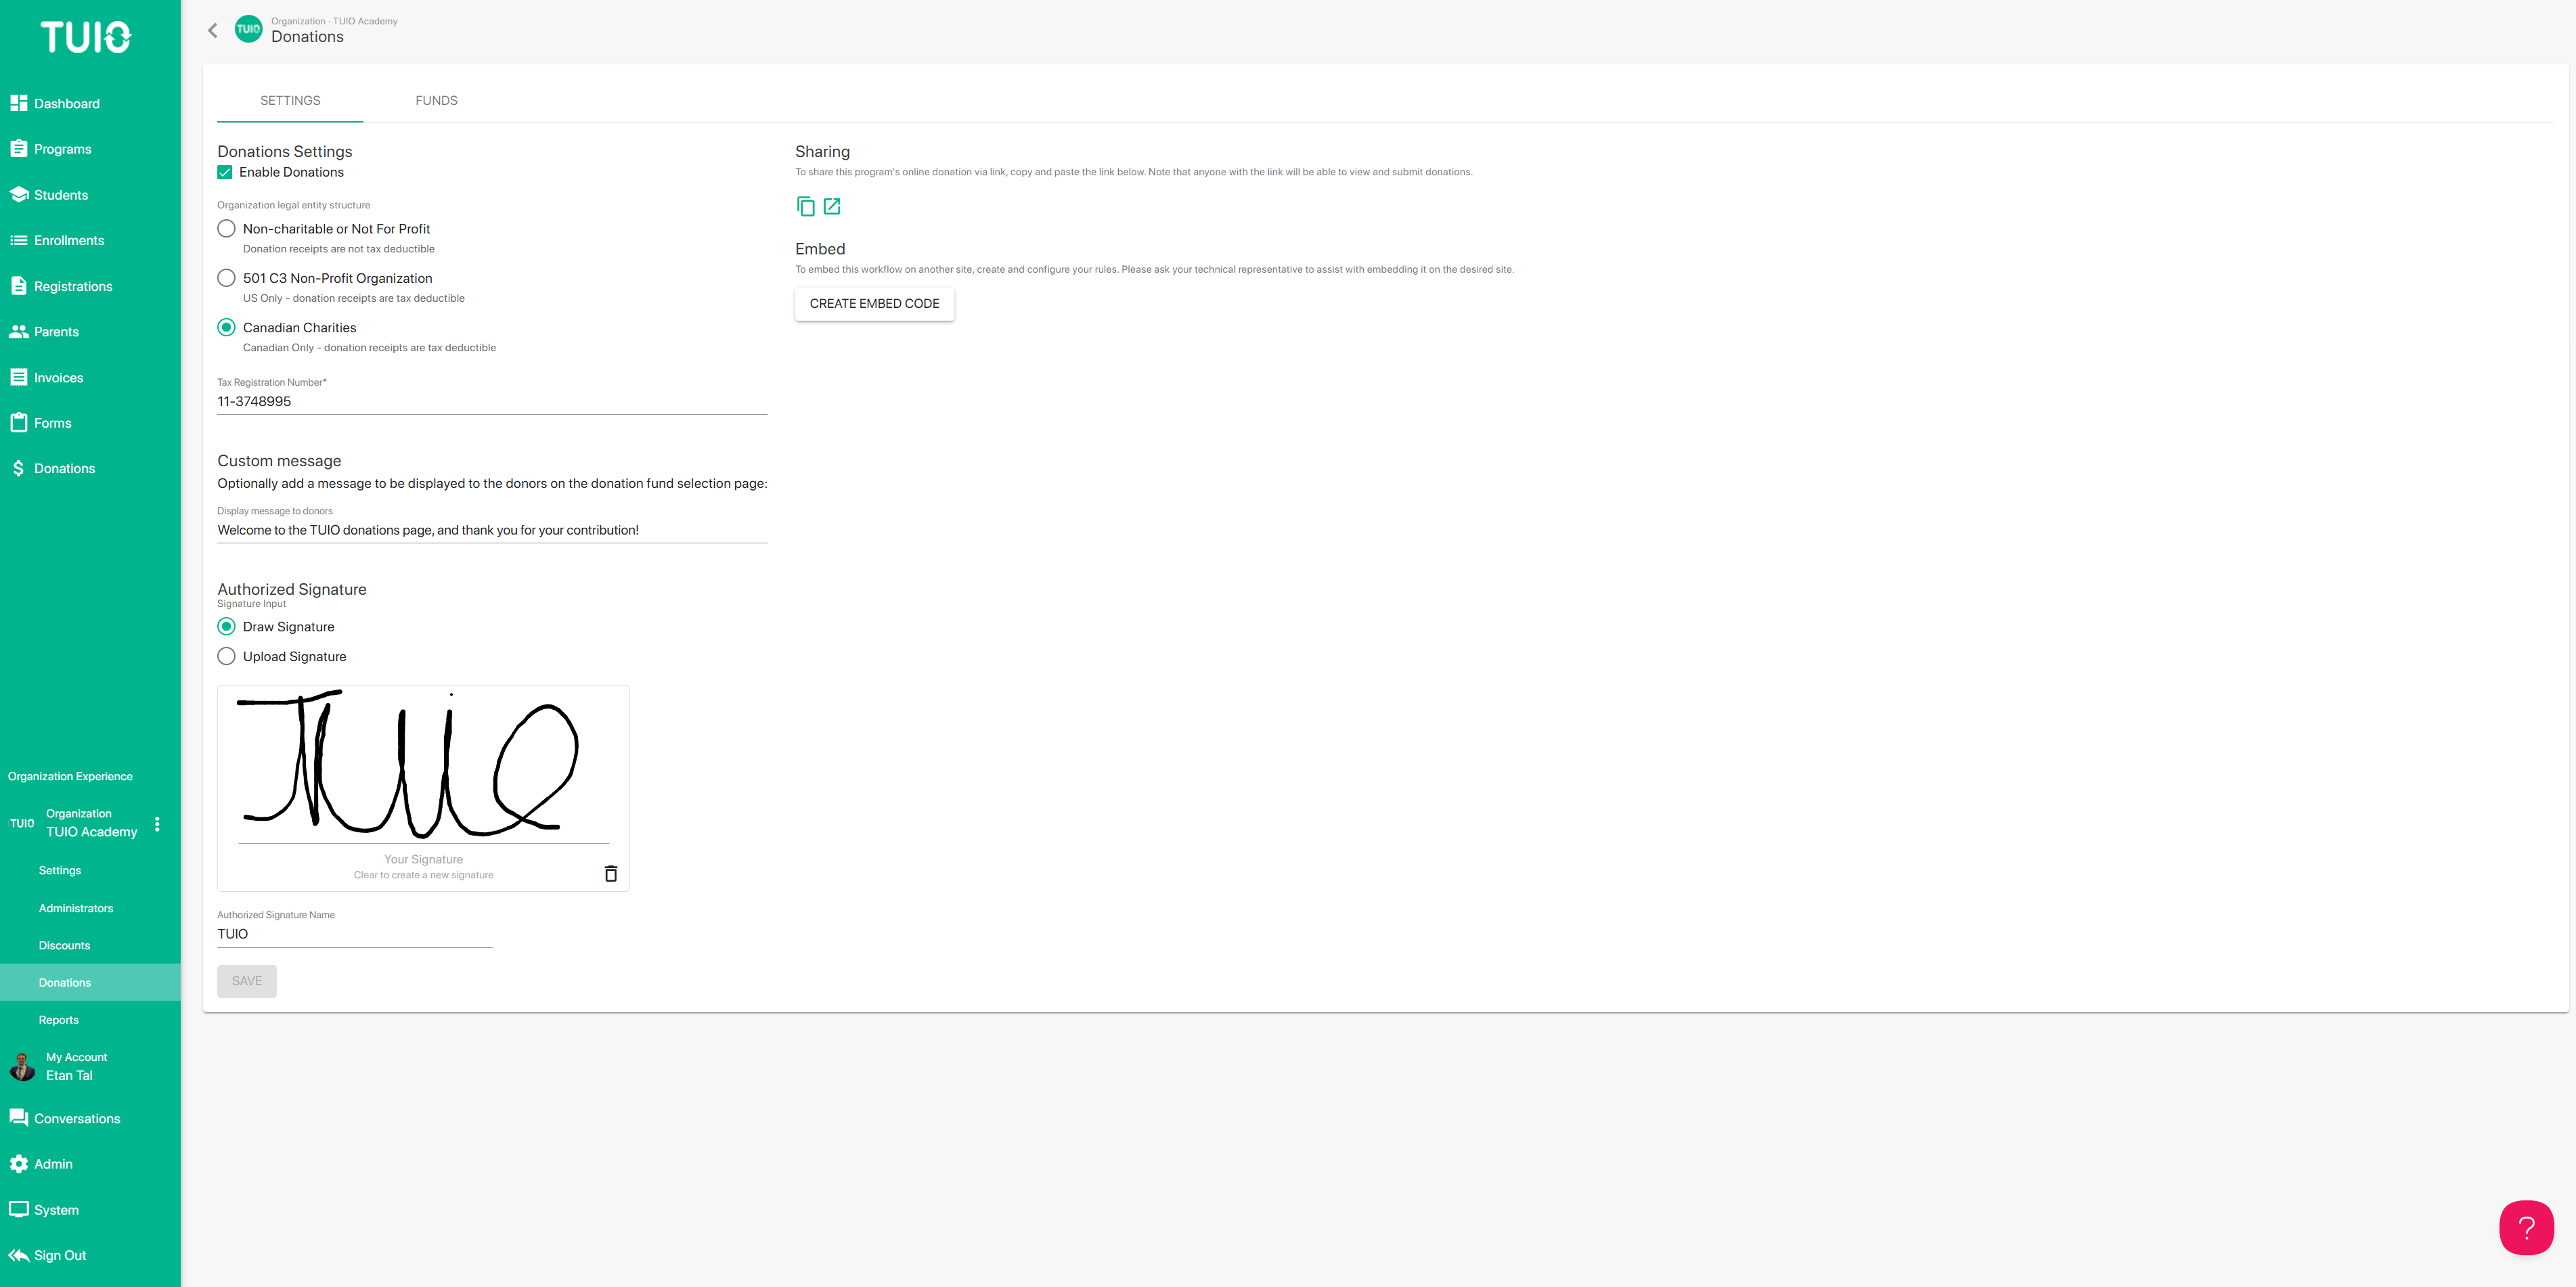
To receive donations on TUIO you will first need to create a Donation Fund. However, before getting started with that there are some profile settings to manage:
Click on your Organization name on the left and then click Donations below to access your Donations homepage.
- Click the checkbox to Enable Donations
- Then choose your legal entity structure, as applicable: Non-charitable, 501 C3 for US organizations, or Canadian Charities.
- Enter your Tax Registration Number, if applicable - EIN for 501 C3, or CRA tax ID for Canadian charities.
- Optionally, add a Custom message to appear on the donation fund selection page that donors access.
- Mark your signature in the Authorized Signature box.
- Finally, enter your Authorized Signature Name.
- Click Save to save your changes.
Adding a Donation Fund
Click the Funds tab that that appears at the top after completing the steps above, and then the white Create button in the top right of your screen. On the donation fund dialog you can give the Donation Fund a name, and you can provide a description too if you want.
Next you can set the donation amounts that will be accepted:
- Click the Allow Custom Amounts checkbox if it's suitable, then you must enter the minimum donation amount that is accepted.
- Add any preset custom donation amounts that you accept by clicking on the Create button within the pop-up, then entering the amounts and clicking the green Create button.
Receive Donations through TUIO
To receive donations, simply click the 'Copy Link' clipboard button to the right of the link, under the Sharing section of your organization's Donations tab. Then you can share the link on your website for donors to access, or you can share it by email to parents, alumni, and any other potential donors!
Alternatively, you can use the Embed code to embed the donation page directly on your website.
Parents will also be able to click the 'Donations' + button in their accounts to donate spontaneously, based on your settings applied in the admin account. This is useful if you want to direct them to self-serve donate on their own.
Donors who access the link will be able to choose from your donation fund and amount options, and pay online directly to you. The donations will populate the ($) Donations tab, where all the relevant details for the donation payments will be displayed.
If you have any questions about this new feature, please contact [email protected].

