This video walks you through the key points — it’s the best way to understand everything in just a couple of minutes.
Further Reading
When a student's enrollment start date begins after the start date of a program you may need to customize the payment plan of the student to prorate the payments.
When you are enrolling the student you can select the payment plan on behalf of the parent and then customize the payments on the payment plan for that particular student. On the Customize payments dialog you can Delete and Edit (and Add) payments to ensure that the invoices are correct for the student.
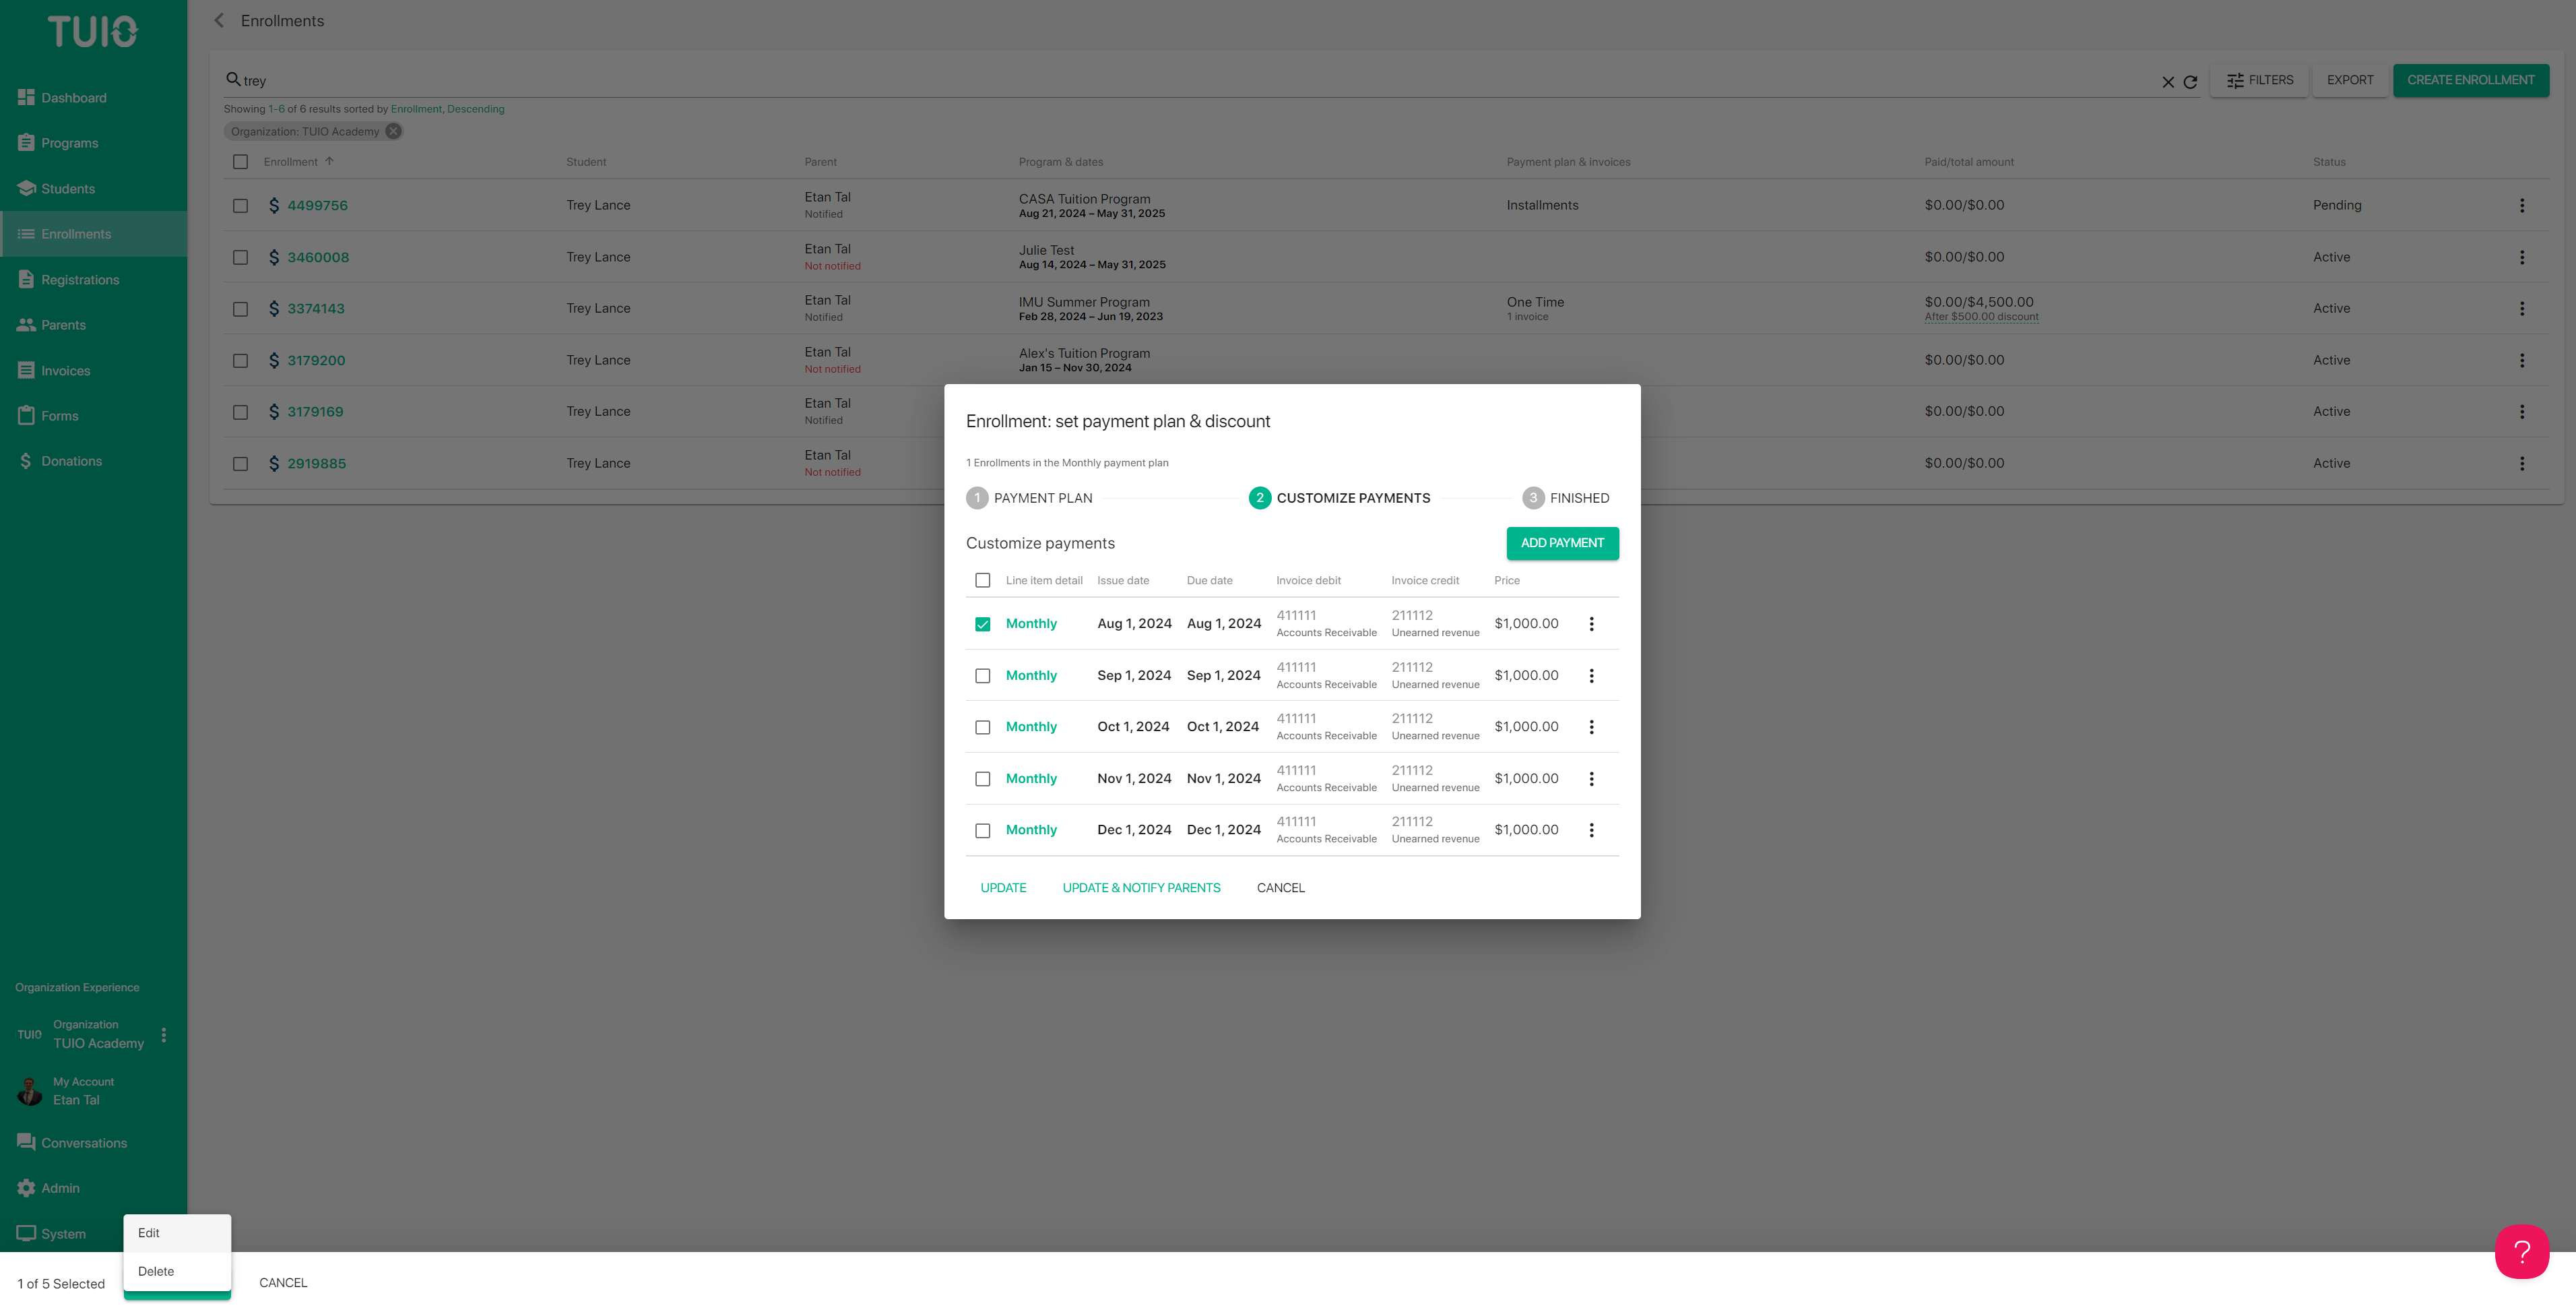
In the Customize Payments dialog, you can:
-
Delete payments (e.g., for months the student won't attend).
-
Edit existing payments (e.g., to adjust tuition amounts).
-
Add new payments if needed.
Example: If the student begins in September, simply select the August payment using the checkbox on the left and click Actions > Delete to remove it.
Payments can be deleted (or edited) one by one or in bulk from the checkbox(es) on the left of the payment name(s). Clicking on the payment name will activate the Edit payment dialog for the payment, and there you can edit the payment details including the Price, Discount and/or Line item detail.
Once you have applied and saved the prorated payment updates you can click Update & Notify Parents to invite the parents to set up payment.
Important Notes
-
Enrollment start/end dates do not automatically adjust payments.
-
You must manually customize the payment plan as outlined above.
-
If you skip this step, parents will be billed according to the standard plan, which may result in overbilling.