This video walks you through the key points — it’s the best way to understand everything in just a couple of minutes.
Further Reading
Once a payment plan has been created, you can edit it at any time. These edits only apply to future enrollments (any users already enrolled will not be affected). This flexibility lets you adjust plans as needed without changing existing enrollments.
For example, if a new enrollment period begins, you can delete or add invoices accordingly without needing to create an entirely new program or payment plan. This keeps your system clean, organized, and efficient.
Editing an Individual Payment in the Plan
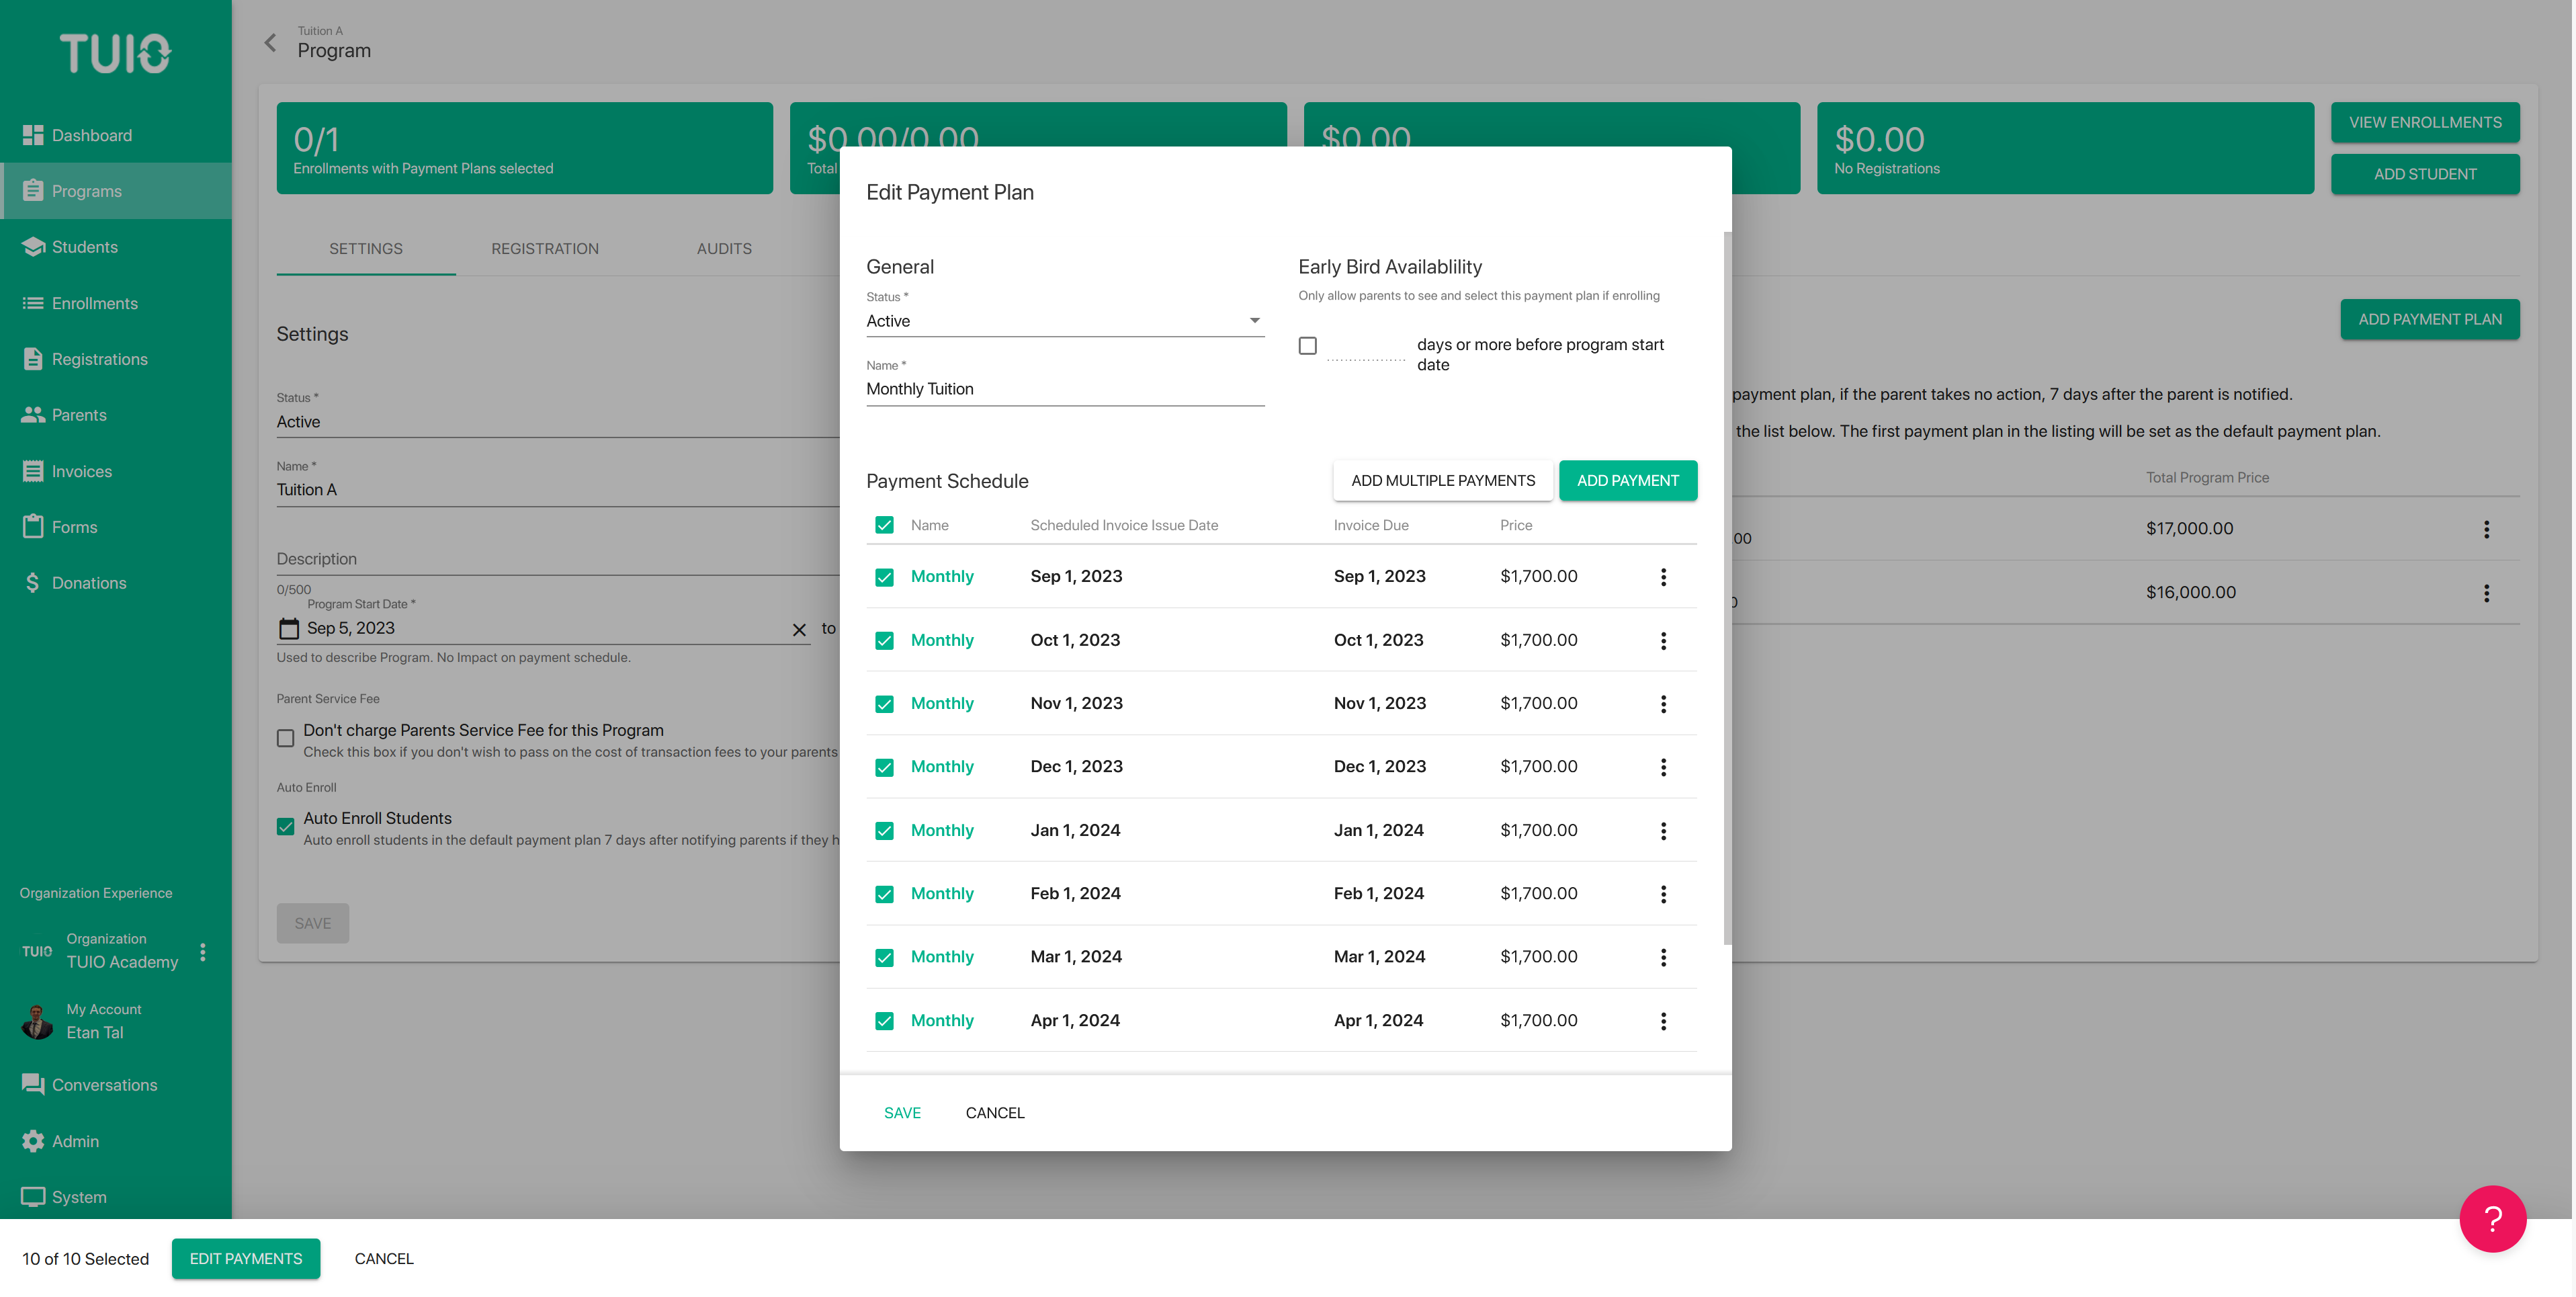
- Click the name of the payment plan (in green) to open it.
- Click on the payment name you want to edit.
- You’ll be able to update key details, such as:
- Name
- Pricing
- Line item details
- Deposit settings (upfront/scheduled, discounts allowed)
- Name
Make your changes, then save.
Bulk Edit Payment Plan
To update multiple payments at once:
- Select the checkboxes next to the invoices you want to edit.
- To select all invoices, click the checkbox under Payment Schedule at the top.
- To select all invoices, click the checkbox under Payment Schedule at the top.
- Click Edit Payments to open the bulk edit dialog.
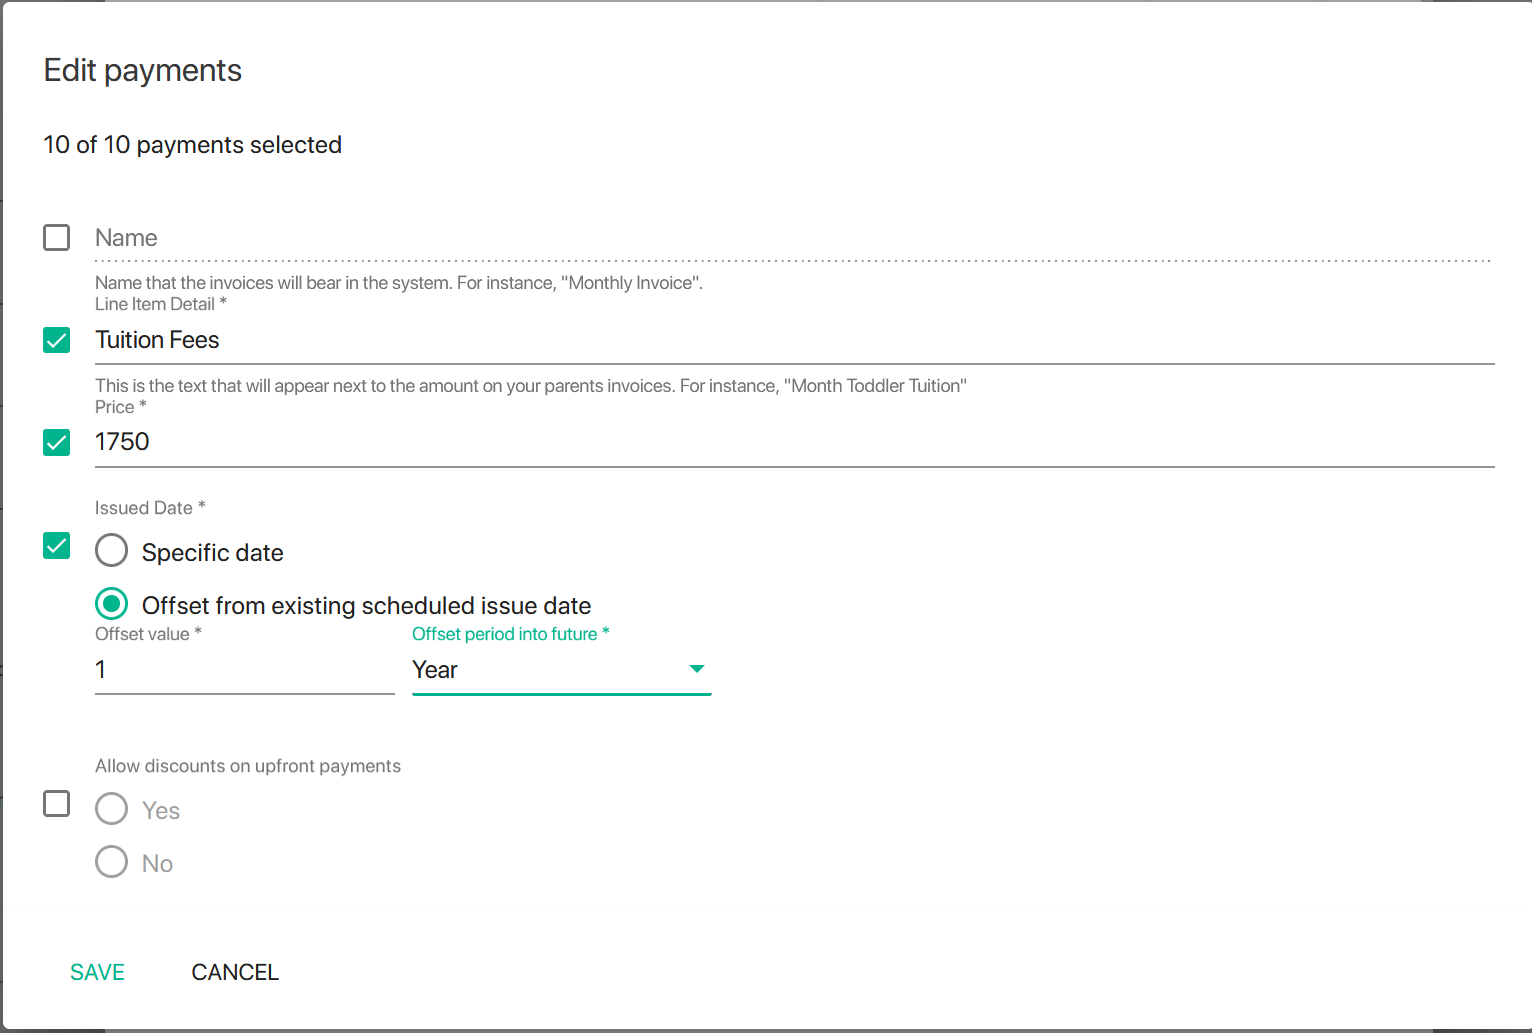
From here, you can adjust:
- Name – Change payment names.
- Line Item Details – Add descriptions or itemized notes.
- Price – Apply new pricing across selected payments.
- Issued Date –
- Set all invoices to the same specific date, or
- Use Offset from existing scheduled issue date to move them forward by a set number of weeks, months, or years.
- Example: Offset by 1 year to shift each invoice forward while preserving the spacing between them.
- Example: Offset by 1 year to shift each invoice forward while preserving the spacing between them.
- Set all invoices to the same specific date, or
- Allow Discounts on Upfront Payments – Enable or disable discounts for all selected upfront/deposit payments.
When done, click Save to apply your changes.