This video walks you through the key points — it’s the best way to understand everything in just a handful of minutes.
Adding a Payment Plan
1. On the program's profile settings, in the 'Payment Plans' section, click Add Payment Plan.
2. On the next screen, enter your payment plan name (e.g. "Full Year Upfront", "$20 One-Time Payment", "Monthly Daycare Fees", etc.).- You are also able to activate the Early Bird Availability option, which allows you to have a payment plan expire after a certain date. To do so, check the corresponding box and enter the number of days before the program start date when parents should no longer see this payment plan. E.g. entering 180 days means that parents have to enroll at least 6 months before the program date to be able to select this plan.
- When you're finished on this screen, hit Save.
3. On the next screen, you will be building a full payment schedule for your payment plan. Click Add Multiple Payments if you are building a plan with several payments or Add Payment for a single payment.
Add Multiple Payments:
- If you have clicked the 'multiple payment' option, you'll be given the option to enter a deposit amount. This will be billed to the parent immediately upon enrollment in the payment plan.
- Next, you can choose between different payment frequencies: Annual, Monthly, Weekly, or Specified Dates & Amounts.
- Choosing the Monthly option, for instance, we could build a plan with a $1,000 deposit, followed by 9 monthly payments of $1000 beginning September 1st. This means that invoices will be issued every month on the 1st of the month. The invoices will be due based your 'Payment Terms', which can be set on your Profile. The default recommendation is 3 days, so in this case the invoices will be due every month on September 4th.
- When you're done, click Add. On the next screen, you will see that a full payment schedule has been generated.
- At this point, you can continue to adjust the payment plan:
- You can click the green hyperlink 'Name' to edit or delete any of the payments one by one, or click the checkboxes to Edit Payments in bulk.
- You can click one of the 'Add payment' buttons to add additional payments to the plan.
-
When you're done, hit Save
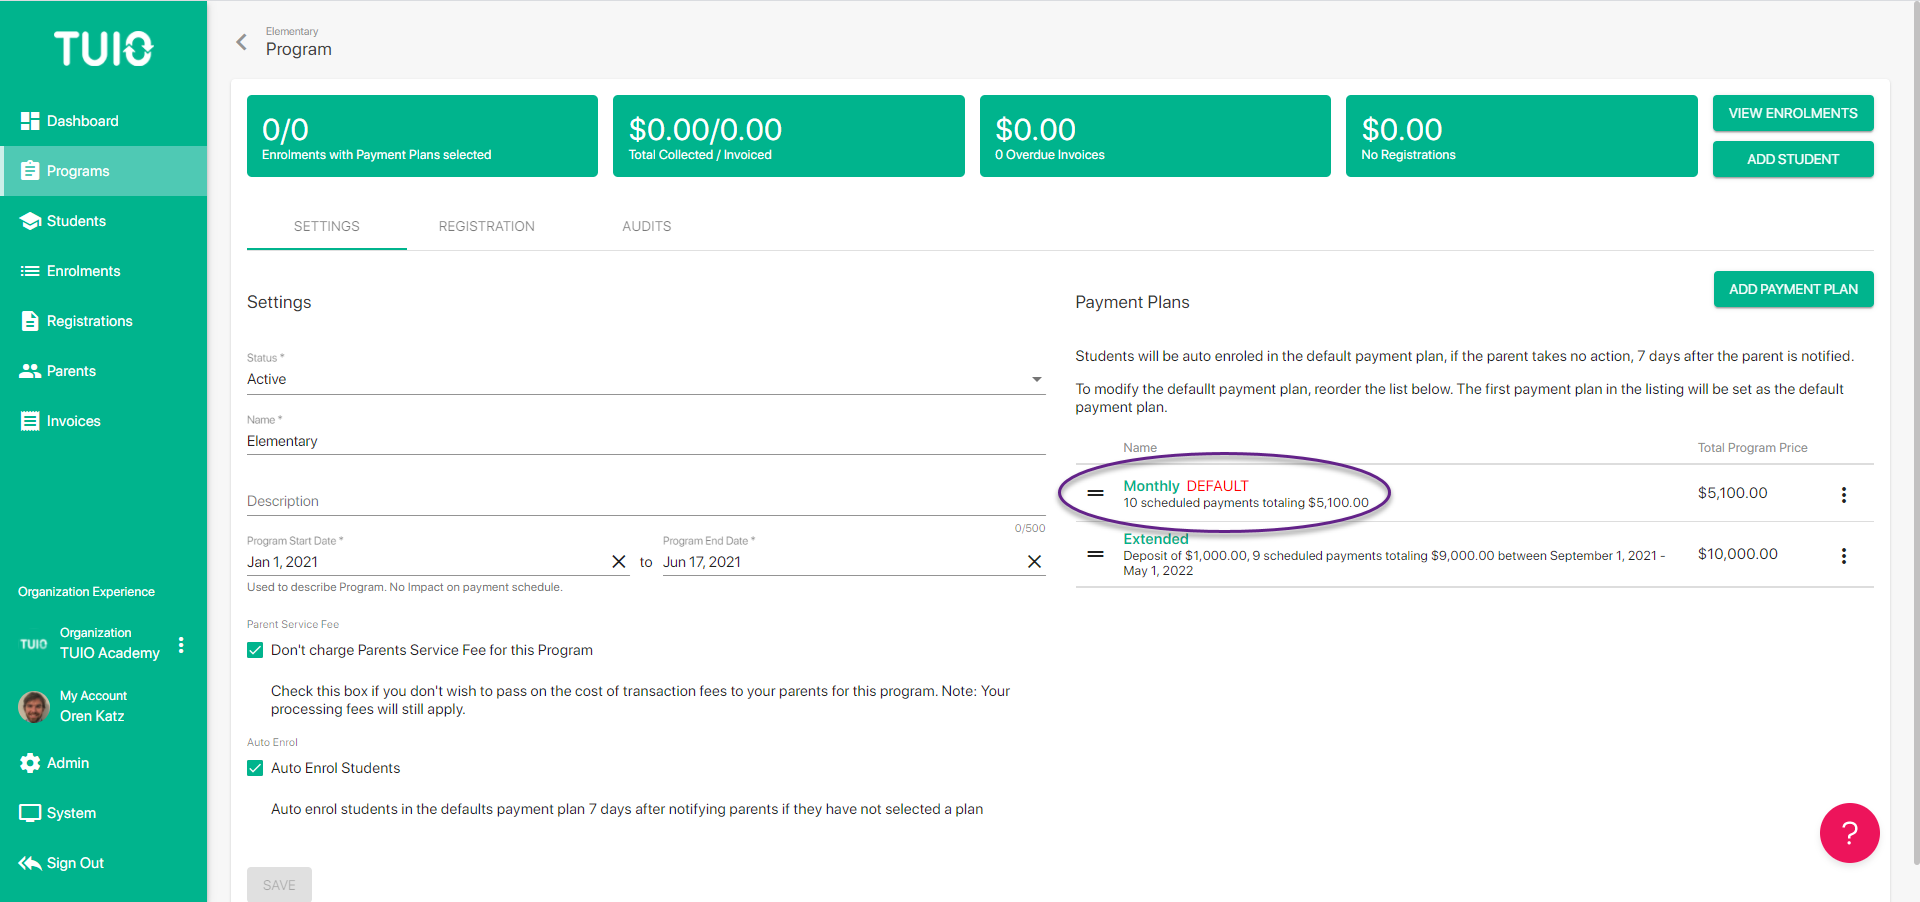
Note: the first payment plan you create will automatically be labelled as 'DEFAULT', signifying that this is the plan students will be automatically enrolled into 7 days after the parent has been notified, if said parent has not taken action (or if a plan has not been selected by admin on their behalf). This avoids situations where no payment plan is selected and invoices do not get issued.
It is possible to change the order of the payment plans and thereby change the 'Default' assignment, by clicking (and holding) the mouse on the 2 parallel lines to drag/drop the plans in your desired order. If the parent was not meant to be in the 'DEFAULT' plan, in most cases they can switch back on their interface. If not, you can always remove or change the payment plan yourself.
If you don't want parents to auto-enroll into a plan, deactivate 'Auto enroll students' on the Program settings tab.