
This video shows an earlier interface. Use the written instructions for the current workflow.
Further Reading
Once you have a form created to register your students, you can enable online registration in a Program, allowing prospective or current families to complete it for enrollment purposes.
Configuring a Program for Registrations
To begin, access the Program profile you intend to activate for Registration. If you haven't created a Program yet, here is how to do so.
Now that you are in the Program, click the Registration Tab.
In this tab, you can set up the Program for online registration:
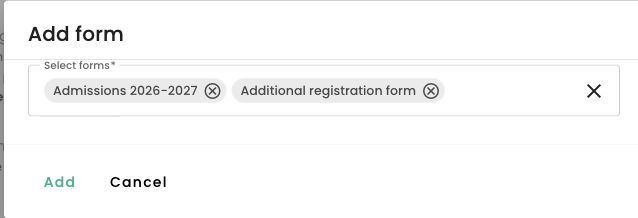
- In the program’s Registration tab, use Add form to open Select forms. Choose the forms you want to attach. Selected forms appear as chips and are added in the order you selected them. Review the resulting form order before sharing the registration link.
- Next, Enable online registrations at the top of this tab screen by clicking the checkbox.
- Finally, you will need to add at least one account to be notified of registration submissions.
Once online registrations are enabled, the registration page can accept submissions. If Enable online registrations is unchecked, parents see that online registrations have not been activated. This message describes the registration setting, not whether the program has reached capacity.
There is also an option available to 'Allow only existing students to register'. This will disable the 'New student' option on the form, so the parent account will need to have an active student that's available to select as an 'Existing student' for the registration.
In the Program registration details, you have the option to format this text box to personalize the registration page and tailor your form's branding.
There are multiple Registration model options available, and the ideal choice depends on whether you plan to manually review registrations and/or charge a fee at the time of initial registration.
You can also add an account to be notified of registration status changes. This will copy that account on Registration status emails (Accepted/Rejected/Waitlisted/Reviewed) that are sent to parents.
Regarding the Service Fee for Credit Cards
Set the registration fee according to your school's published pricing and policy. Review the total parents will see before sharing the registration page. Processing costs and service-fee settings depend on your account; contact support@tuiopay.com if you need help confirming them.
The last step is to copy the form link and share it, or embed the registration URL (or embed code) to your website to drive form submissions.
After registration submissions are received, they will appear in the 'Registrations' tab of your TUIO Organization Admin account for you to review and, if necessary, make decisions. More on that here.
Share a program or category registration page
The Registration page section provides the link for this program. To group several programs on one registration landing page, use Program Categories. Review the category page and program eligibility before sharing the link with families.
Check the setup before sharing a copied registration
Review the program name and school year, selected registration model, linked forms, and the fee and payment setup. The Forms section lists the forms attached to the program. Open the registration page to check what families will see.
If a copied registration shows an unexpected fee or form, contact support@tuiopay.com with the registration ID, program name, and what you expected to see.
Current registration settings example
The Registration tab shows the registration options, model choices, linked forms, and registration page link.
Video walkthrough
The video may show earlier screens. Follow the written steps above for the current controls.
