b. How to Restrict Admin Access
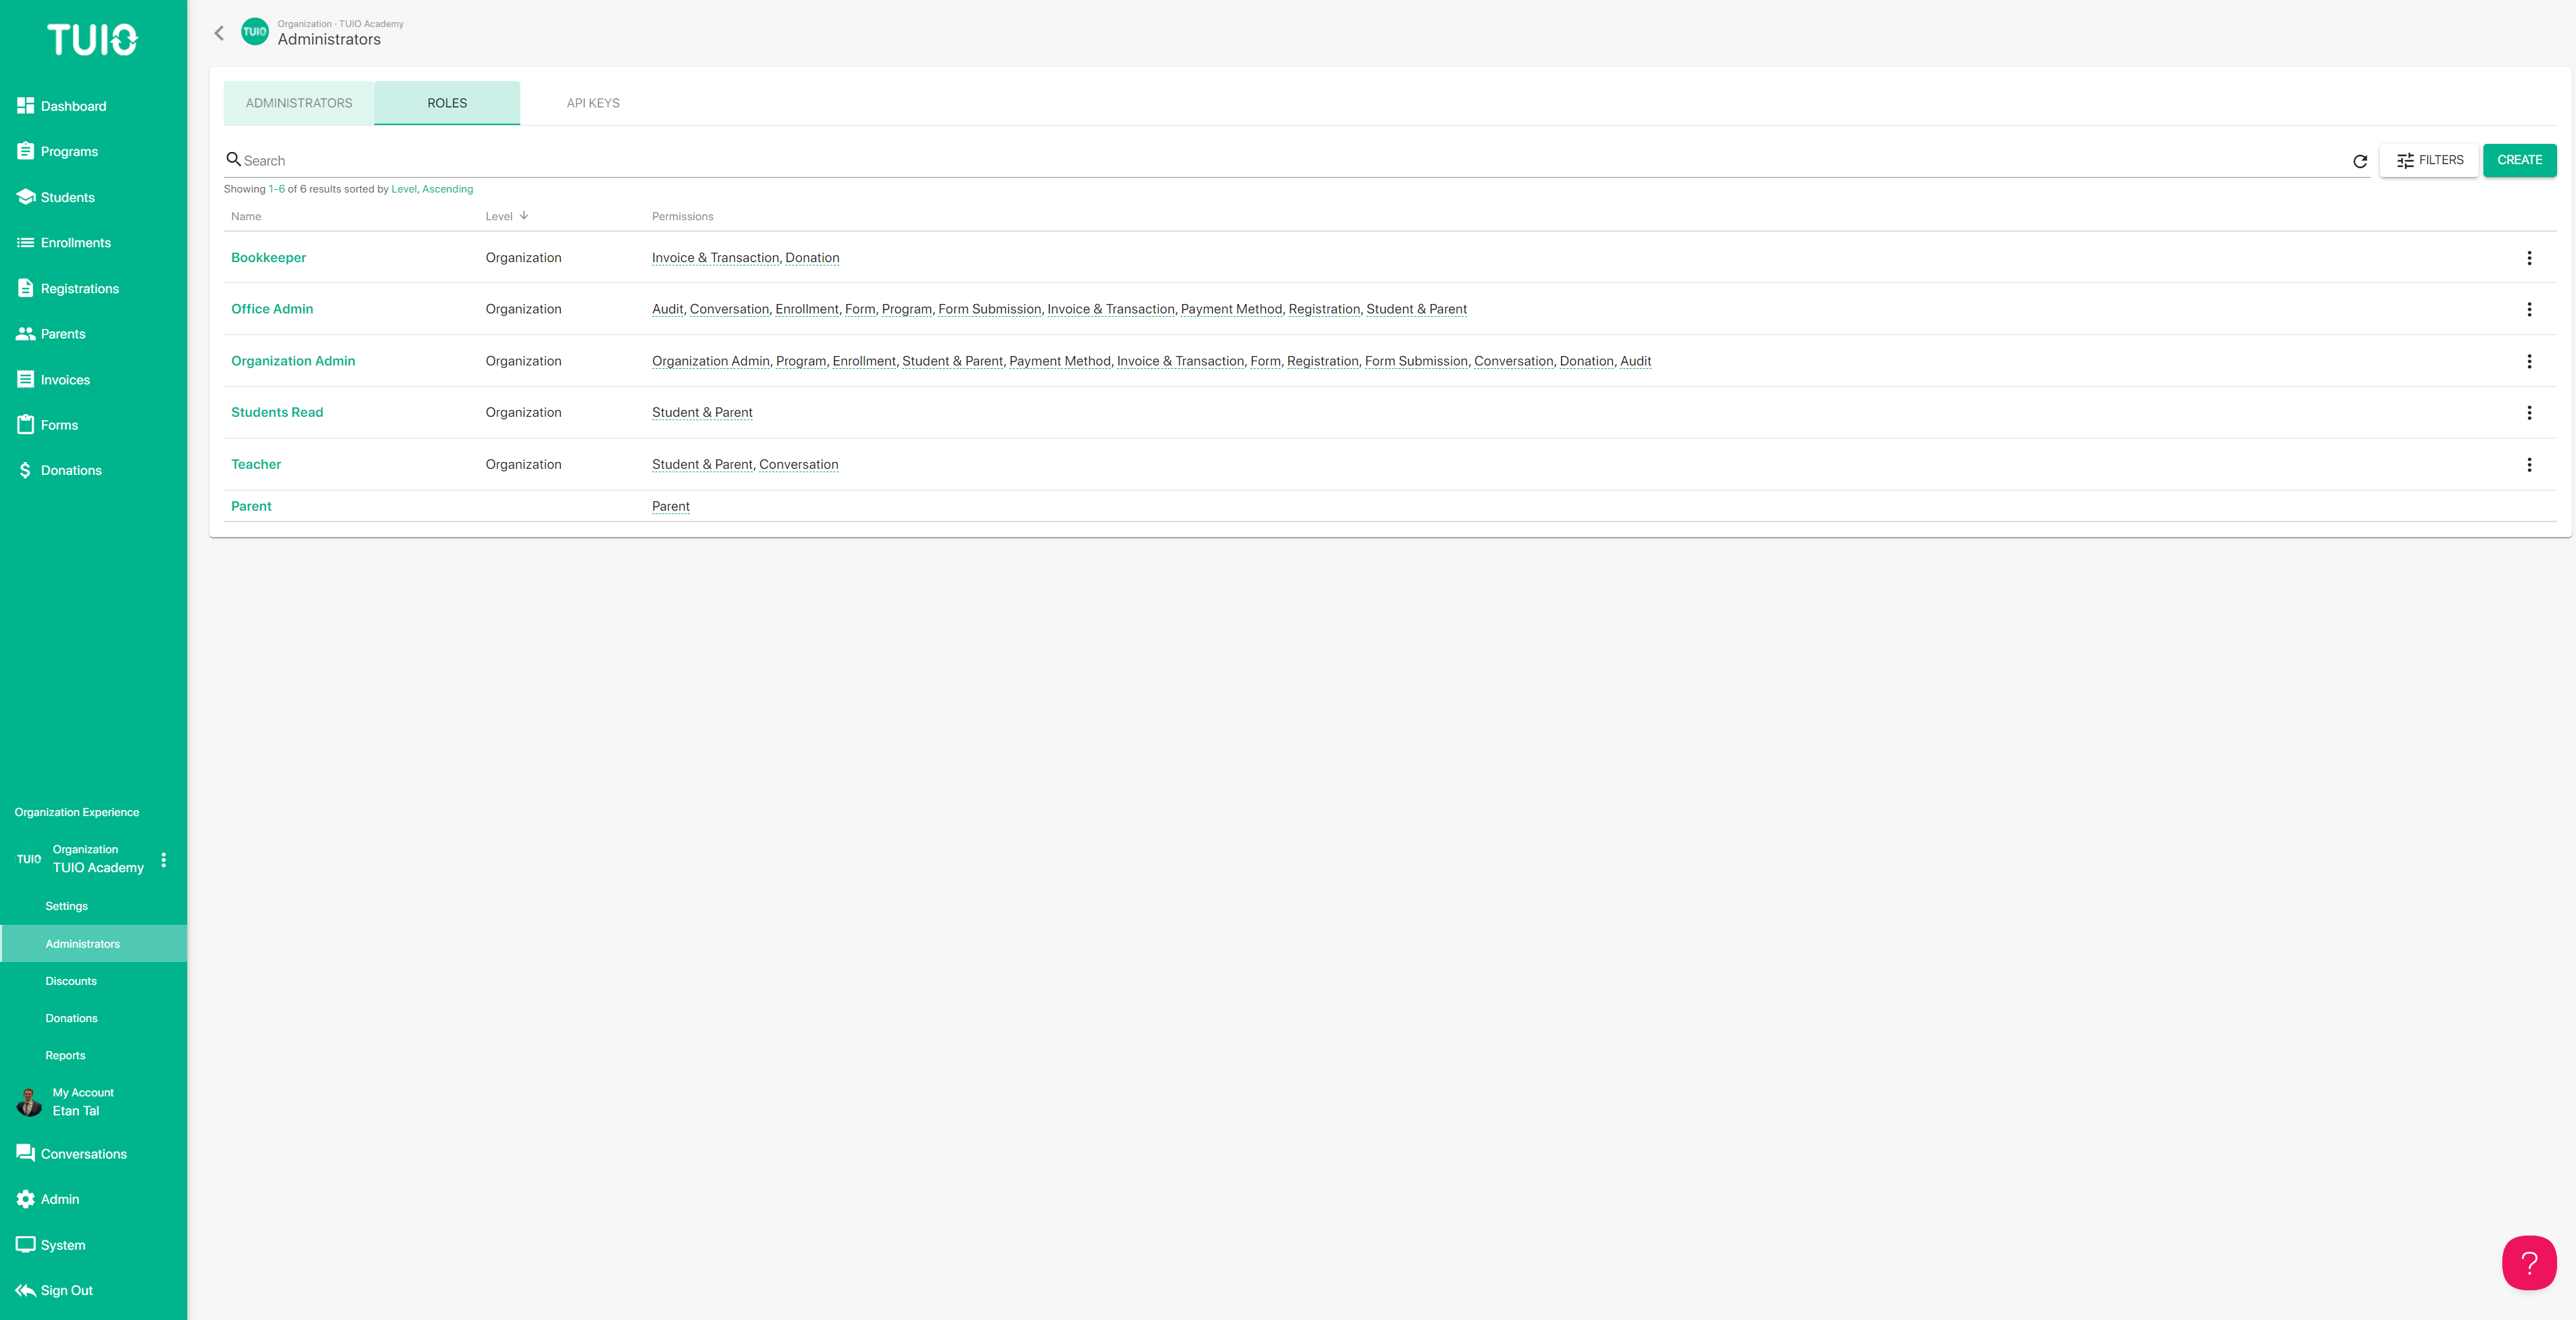
The Roles feature can be used to create administrator roles with customizable account permissions. The roles can be assigned to specific admin accounts, and new admin accounts can be invited with the selected role.
To get started click on the Administrators tab in the Organization Experience settings list. The Roles tab at the top is where you can create and manage the custom roles.
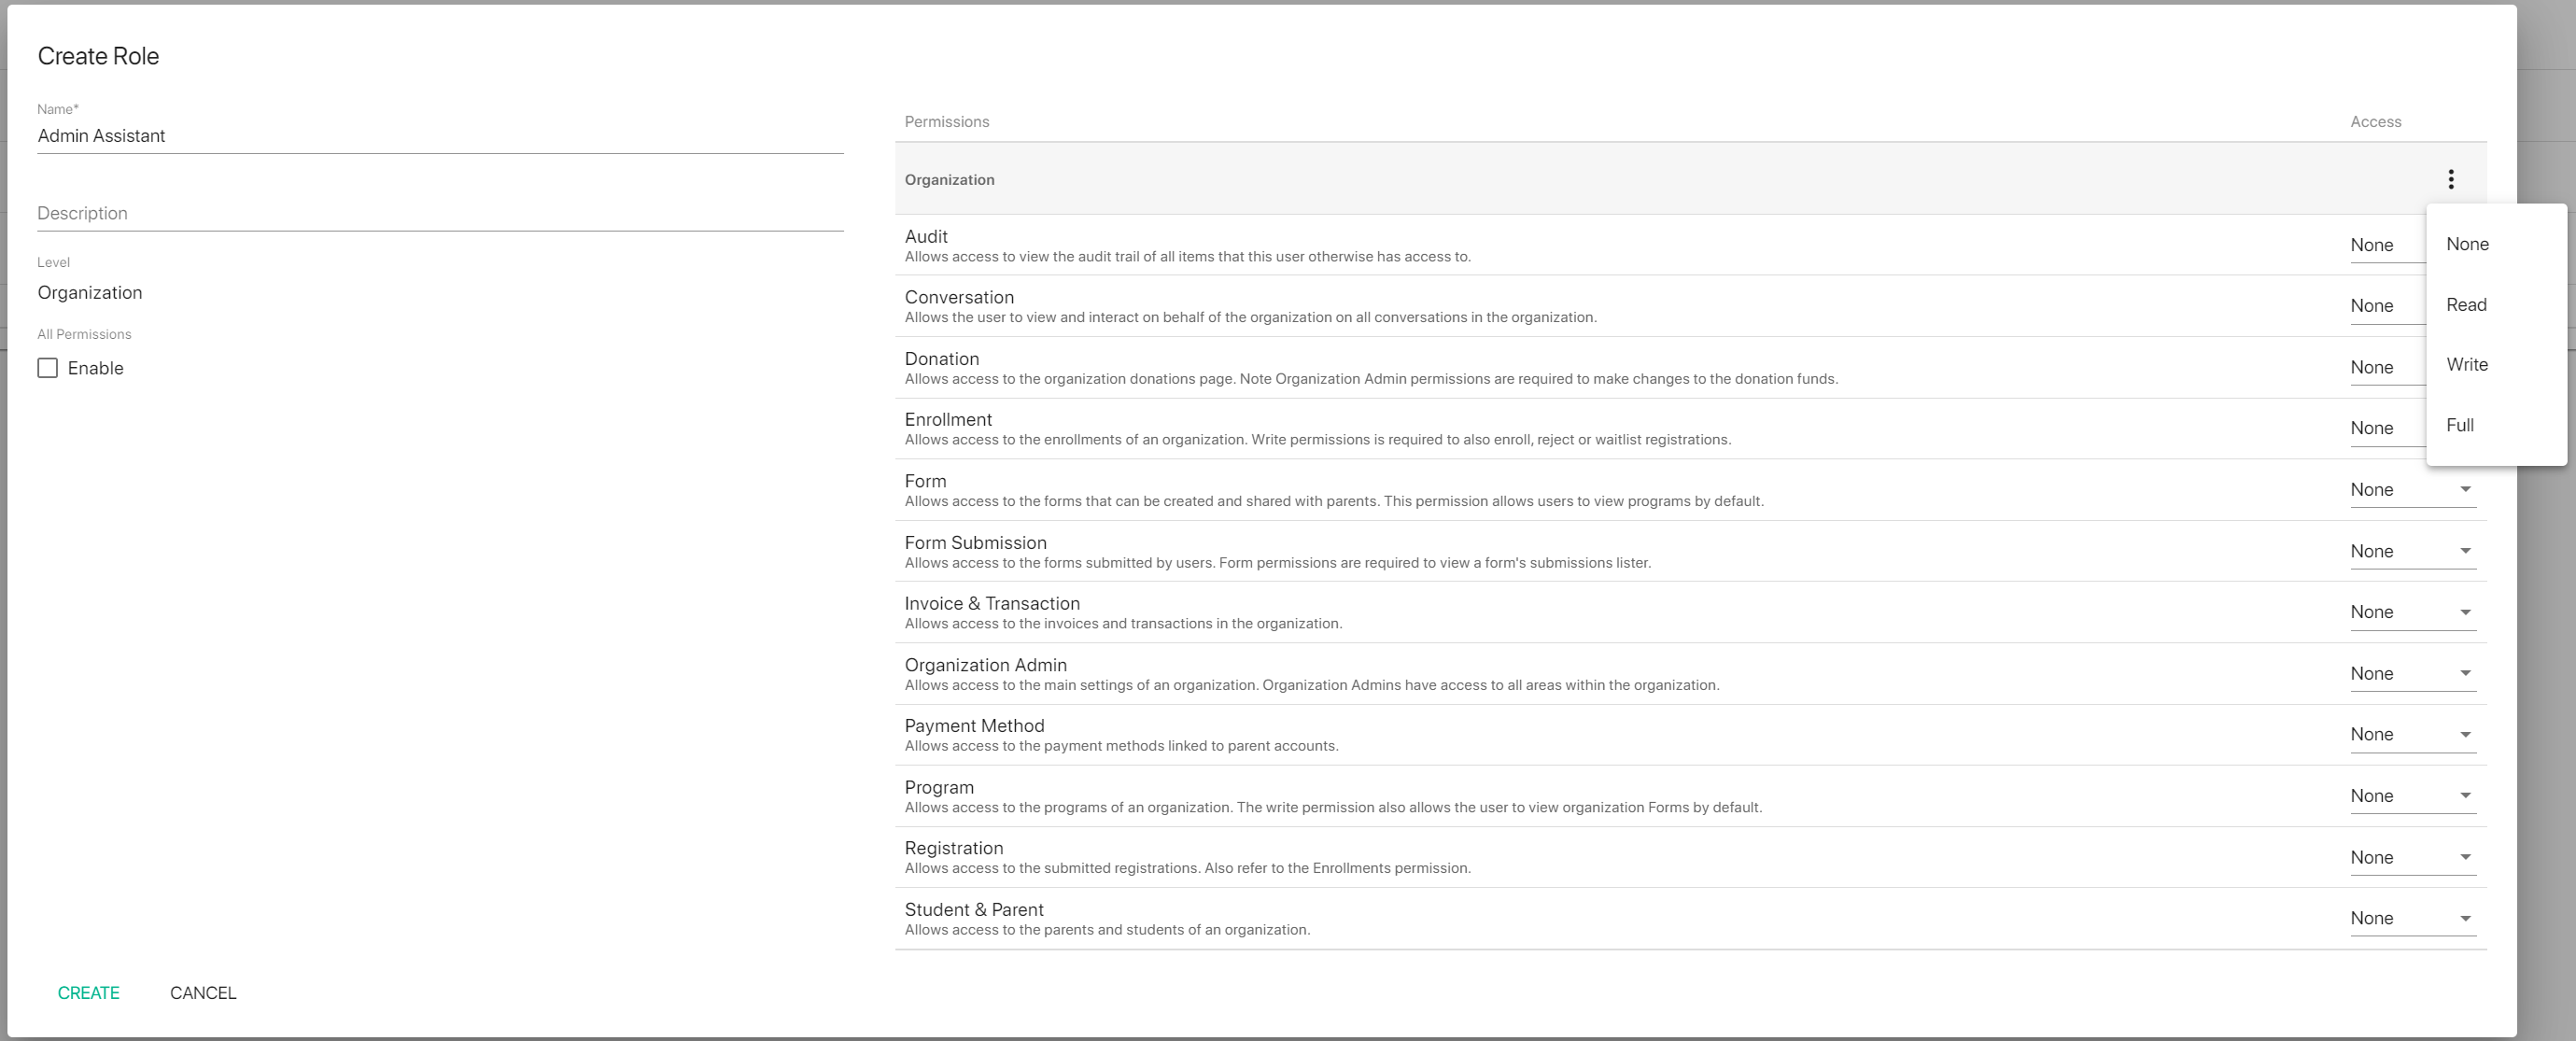
Click the Create button to begin creating a new role. Then give the role a name - for example, you can name the role based on the job title associated with the role, the permissions associated with the role, or the individual who the role is intended for.
Next, click the checkbox under All Permissions where it says Enable. This will clear all permissions to None so you can choose which permissions to enable for this role. If you click the 3 dots at the top of the Access column you can set the Access globally for all permissions to either Read, Write, or Full.
The permissions can also be selected one by one on each item. Here is the list of permissions available:
- Audit - this provides access to the audit log tab for all items the user can access.
- Conversation - this provides access to the Conversations tab for viewing and sending messages.
- Donation - this provides access to the Donations tab, where donations can be viewed and recorded. Organization Admin permissions are required to gain access to the Donations tab where the set up options are available.
- Enrollment - this provides access to the Enrollments tab to view student enrollments. Write permissions are required to create or edit enrollments, and apply a status to registrations.
- Form - this provides access to the Forms tab for building and editing forms and custom fields. Registration forms need to be linked to programs, so Forms permission also provides access to view the Programs tab.
- Form Submission - this provides access to the submitted form PDFs and data.
- Invoice & Transaction - this provides access to the Invoices tab where invoice and transaction data is stored, and also the Dashboard. Write permissions allow the user to add, edit and delete invoices, and apply invoice credits and refunds.
- Organization Admin - this is the standard admin permission to access the Settings tabs below the Organization Experience, as well as all other areas in the TUIO portal.
- Payment Method - this provides access to the Payment Methods tab on parent profiles. Write permission is required to create Credits on the parent profile.
- Program - this provides access to the Programs tab to view the list of programs. The write permission allows the user to create, edit and remove programs, and also provides access to view the Forms tab to integrate registration forms.
- Registration - this provides access to the Registrations tab to view submitted registrations.
- Student & Parent - this provides access to the Students tab and Parents tab, to view the associated profiles on the lists.
Once a new role has been set up you can invite an administrator from the Invite button, under Administrators, or click on an Administrator name to assign their role from the checkbox.
If you have any questions about the available permissions please contact support@tuiopay.com.


